https://me-encantas.com/2021/05/18/5-consejos-para-hacer-el-mejor-pan provides valuable guidance to help both beginners and seasoned bakers achieve perfection. The process of making bread might seem daunting at first, but with these expert tips, you’ll soon find yourself crafting golden, crusty loaves that rival those from your favorite bakery. From choosing the right ingredients to mastering kneading techniques, these steps will ensure you get the best results every time.
The tips outlined in “https://me-encantas.com/2021/05/18/5-consejos-para-hacer-el-mejor-pan” offer an easy-to-follow path for home bakers. Whether you’re looking to bake a classic loaf or experiment with creative variations, each step builds the foundation for a successful baking experience. From selecting quality flour to perfecting the baking temperature, every detail matters in achieving that soft interior and crisp exterior that makes homemade bread so satisfying.
Mastering Bread Baking: Key Tips from https://me-encantas.com/2021/05/18/5-consejos-para-hacer-el-mejor-pan
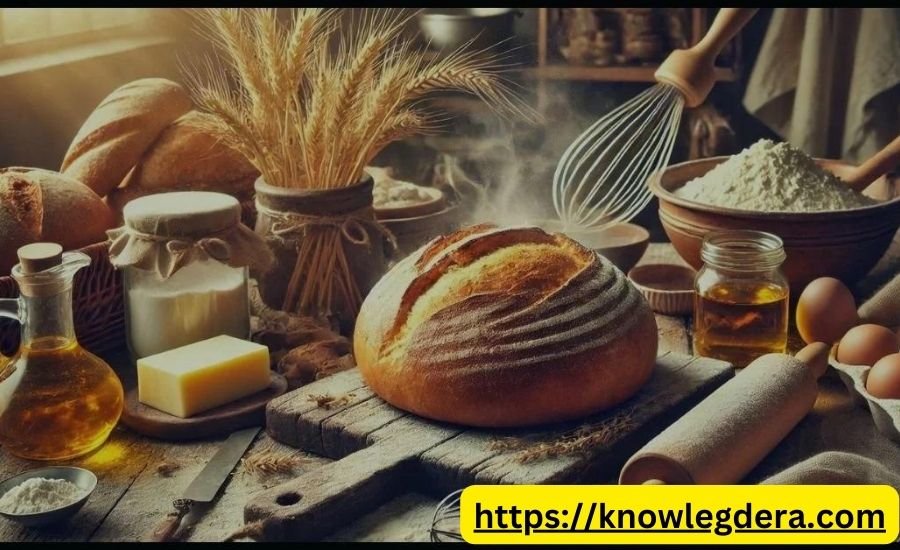
Baking bread is a rewarding experience, and the blog Post https://me-encantas.com/2021/05/18/5-consejos-para-hacer-el-mejor-pan shares five essential tips to help you create the perfect loaf. Whether you’re just starting or have some experience, the guidance provided can make a big difference. In bread baking, attention to detail, from ingredients to kneading techniques, can elevate your homemade loaf to bakery-level quality.
For many bakers, the magic happens when the right ingredients are combined with the correct techniques. https://me-encantas.com/2021/05/18/5-consejos-para-hacer-el-mejor-pan emphasizes the importance of fresh, high-quality flour and yeast, as well as proper proofing to let the dough rise perfectly. Following these tips not only results in delicious bread but also makes the process enjoyable and satisfying.
Choosing Quality Ingredients for the Best Bread
Selecting the right ingredients is the first step toward baking excellent bread. High-quality flour is key because it determines the texture and flavor of your bread. Opting for unbleached, organic flour gives a richer flavor and helps develop gluten, which adds chewiness to the loaf. This is particularly important when following the tips in https://me-encantas.com/2021/05/18/5-consejos-para-hacer-el-mejor-pan, where flour quality is prioritized.
Yeast is another crucial ingredient. Fresh, active yeast ensures that your bread rises well, giving it a light and airy texture. Before you start, always check the expiration date on your yeast to guarantee it’s effective. Using old yeast can result in flat or dense bread. Finally, don’t forget that water quality matters. Filtered or bottled water works best to avoid any chemicals that might affect the dough’s rise.
Mastering the Art of Kneading for Perfect Bread
Kneading is an essential part of the bread-making process, as it develops gluten, which gives bread its structure. Following the guidance from https://me-encantas.com/2021/05/18/5-consejos-para-hacer-el-mejor-pan, proper kneading will make your dough smooth and elastic. This step cannot be rushed, as it’s what transforms the dough from a sticky mess into a workable base for your loaf.
If you’re kneading by hand, take about 8-10 minutes to fold and press the dough until it springs back when touched. Alternatively, you can use a stand mixer with a dough hook, which makes the process easier and ensures even kneading. The key is to ensure the dough doesn’t tear when stretched, which indicates the gluten is fully developed. This gives your bread the right texture, helping it rise and bake beautifully.
Proofing Dough: The Key to Fluffy Bread
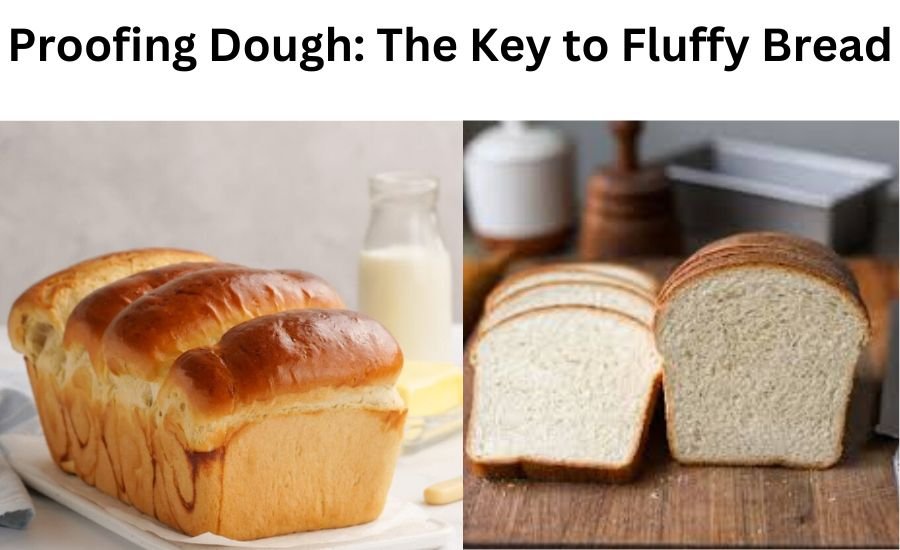
Proofing your dough, or letting it rise, is critical to achieving soft and fluffy bread. The advice from https://me-encantas.com/2021/05/18/5-consejos-para-hacer-el-mejor-pan suggests proofing in a warm, draft-free environment to allow the yeast to work effectively. This stage is where the dough expands, creating the airy structure that makes bread light and fluffy.
During the first proof, leave the dough in a covered bowl and allow it to rise until it doubles in size. This can take one to two hours, depending on the temperature of your kitchen. After shaping the dough for its final form, proof it again to ensure a second rise. Be careful not to over-proof the dough, as this can cause it to collapse during baking.
Baking at the Right Temperature for Perfect Bread
Baking is the final step where all your hard work comes together, and getting the temperature right is crucial for a perfect loaf. According to https://me-encantas.com/2021/05/18/5-consejos-para-hacer-el-mejor-pan, a preheated oven is essential for even baking and a good rise. Most bread recipes call for an oven temperature between 375°F and 450°F, depending on the type of bread.
Using steam during the first few minutes of baking can help develop a crispy crust. This can be done by placing a pan of water in the oven or spraying water inside just before placing the bread. Once baked, the bread should have a golden-brown crust and sound hollow when tapped. Let it cool completely before slicing to prevent the inside from becoming gummy.
These tips from https://me-encantas.com/2021/05/18/5-consejos-para-hacer-el-mejor-pan provide a solid foundation for perfecting your bread-making skills, ensuring every loaf turns out delicious and satisfying.
The Importance of Measuring Ingredients Accurately
Accurate measurement of ingredients is a fundamental rule in bread-making. Unlike other types of cooking, where you can improvise, baking is a precise science, and a small deviation can affect the texture, taste, or rise of your bread. As highlighted in https://me-encantas.com/2021/05/18/5-consejos-para-hacer-el-mejor-pan, it’s crucial to use a kitchen scale for measuring ingredients like flour and water to ensure consistency.
Flour can be tricky to measure if using cups, as it can pack down differently depending on how it’s handled. This can result in too much or too little flour, which can affect the dough’s consistency. Weighing flour is the best method to ensure you’re adding the right amount. Similarly, water measurement must be precise to create the right hydration level, which helps in the development of gluten. Getting the ratios right will guarantee a perfect dough every time.
How to Properly Cool and Store Your Bread
Cooling and storing your bread properly is just as important as baking it. According to https://me-encantas.com/2021/05/18/5-consejos-para-hacer-el-mejor-pan, allowing your bread to cool on a wire rack is essential to prevent the bottom from becoming soggy. Cooling also ensures that the crumb inside the bread sets properly. If sliced too soon, the steam trapped inside can cause the bread to become gummy.
Once cooled, it’s important to store your bread in a way that preserves its freshness. For short-term storage, a bread box or paper bag is ideal for keeping the crust crispy while maintaining the softness of the inside. If you need to store bread for longer, wrapping it in plastic wrap and freezing it is a great option. Frozen bread can last up to three months, and you can easily defrost slices as needed.
Avoid Common Bread-Making Mistakes
Bread-making can be tricky, especially for beginners. Mistakes like over-kneading, under-proofing, or using too much flour can lead to less-than-ideal results. One of the key points emphasized in https://me-encantas.com/2021/05/18/5-consejos-para-hacer-el-mejor-pan is learning how to avoid these common mistakes to ensure consistent results.
Over-kneading is a frequent issue when using a stand mixer, as the dough can become tough if it’s worked too long. Under-proofing is another common mistake that can result in dense, flat bread. It’s important to watch the dough and ensure it has properly doubled in size during the proofing process. By understanding and avoiding these pitfalls, you can greatly improve your bread-baking skills and achieve better results with each batch.
Experimenting with Different Flavors and Styles of Bread
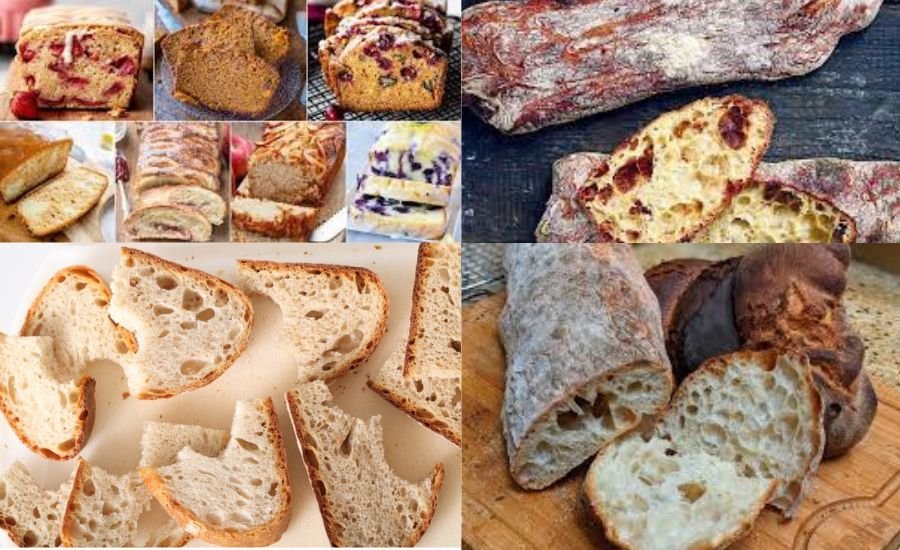
Baking bread at home gives you the freedom to experiment with various flavors and styles. https://me-encantas.com/2021/05/18/5-consejos-para-hacer-el-mejor-pan encourages bakers to try adding ingredients like herbs, spices, seeds, or dried fruits to create unique and flavorful loaves. This creative approach allows you to personalize your bread to your taste and dietary preferences.
For a savory twist, try incorporating herbs like rosemary, thyme, or basil into the dough. These flavors complement meals like soups and salads perfectly. On the sweeter side, you can add dried fruits like raisins or cranberries, which are ideal for breakfast bread. Exploring different bread types like sourdough, whole wheat, or even rye can also introduce new textures and flavors to your baking repertoire. Each loaf you create will become a unique masterpiece, tailored to your preferences.
With these additional insights, https://me-encantas.com/2021/05/18/5-consejos-para-hacer-el-mejor-pan truly helps elevate your bread-making journey, providing helpful, practical tips that are easy to follow and implement. Each step in the process—from choosing ingredients to baking and storing—plays a crucial role in achieving delicious, high-quality bread at home.
Understanding the Role of Temperature in Bread Baking
Temperature control is essential in every stage of the bread-making process, from proofing the dough to baking it to perfection. As discussed in https://me-encantas.com/2021/05/18/5-consejos-para-hacer-el-mejor-pan, managing the temperature of both your dough and oven plays a key role in ensuring consistent, high-quality bread. For proofing, dough rises best in a warm, draft-free environment. If your kitchen is too cool, you may find the dough takes longer to rise, which can affect the texture and flavor of your bread.
When it comes to baking, ensuring your oven is preheated to the right temperature is critical. Most bread recipes call for an oven set between 375°F to 450°F. This range allows the dough to rise quickly during the first few minutes of baking—this is called “oven spring.” If your oven is not hot enough, the dough won’t rise as much, resulting in a denser loaf. Make sure to use an oven thermometer for accuracy, as not all ovens heat evenly.
Why Proper Kneading Prevents Dense Bread
Kneading is an essential technique that affects both the texture and the rise of your bread. In https://me-encantas.com/2021/05/18/5-consejos-para-hacer-el-mejor-pan, it’s highlighted that kneading helps develop gluten, the protein structure that traps air bubbles and allows your bread to rise beautifully. Without proper kneading, your dough will not have the elasticity needed to create that light and airy interior, leading to a denser, less fluffy loaf.
By working the dough, you are strengthening the gluten, making the dough more elastic and workable. When kneading by hand, focus on stretching and folding the dough repeatedly for around 10 minutes. For those using a stand mixer, the dough hook can help achieve consistent kneading without as much physical effort. Knowing when to stop is also important—over-kneading can make the dough tough, so look for the telltale signs like a smooth, elastic texture and the ability to stretch the dough without tearing.
Proofing Dough Twice for the Best Texture
One of the expert tips from https://me-encantas.com/2021/05/18/5-consejos-para-hacer-el-mejor-pan is to proof the dough twice for a lighter, airier loaf. Proofing, or allowing the dough to rest and rise, is where the yeast ferments the sugars in the flour, producing gases that make the dough expand. This process not only adds volume but also improves the texture and flavor of the bread.
The first proof, called bulk fermentation, happens after kneading and should allow the dough to double in size. A second proofing happens after the dough has been shaped. This second rise ensures the dough gets one final boost before baking, which is key to creating a soft crumb. Be mindful not to rush this process, but also avoid over-proofing, as it can cause the dough to deflate during baking. A perfectly proofed dough will feel soft, slightly puffy, and will spring back when gently pressed.
Using Steam for a Crispy, Golden Crust
One trick that professional bakers swear by is using steam during the baking process to create a crispy, golden crust. https://me-encantas.com/2021/05/18/5-consejos-para-hacer-el-mejor-pan recommends adding steam during the first few minutes of baking, which helps the crust form slowly while the inside of the bread continues to expand. This technique is particularly useful for rustic, artisan-style breads where a thick, crunchy crust is desired.
You can create steam in your oven by placing a pan of hot water on the bottom rack or by misting the oven walls with water before placing your dough inside. The moisture from the steam slows down the crust formation, allowing the bread to rise fully before the crust hardens. The result is a beautifully golden, crisp crust that contrasts perfectly with the soft interior of the bread.
Storing Bread to Keep It Fresh Longer
Proper storage is key to maintaining the freshness and texture of your homemade bread. As mentioned in https://me-encantas.com/2021/05/18/5-consejos-para-hacer-el-mejor-pan, storing bread the right way can extend its shelf life and keep it from drying out. Freshly baked bread can be stored at room temperature for a couple of days, but after that, it’s best to freeze any leftovers to maintain freshness.
For short-term storage, a paper bag or bread box is ideal because it allows the bread to breathe while preventing it from becoming too moist or drying out too quickly. Avoid storing bread in plastic bags unless you plan to freeze it, as plastic can trap moisture and cause the bread to become soggy. When freezing, wrap the bread tightly in plastic wrap and aluminum foil to protect it from freezer burn. To enjoy frozen bread, simply reheat it in the oven for a few minutes to restore its original crispness.
These detailed tips from https://me-encantas.com/2021/05/18/5-consejos-para-hacer-el-mejor-pan will not only help you perfect your bread-making process but also ensure that each loaf is baked to perfection and stays fresh for longer.
Conclusion
Baking bread at home can be a fun and rewarding experience. By following the tips from https://me-encantas.com/2021/05/18/5-consejos-para-hacer-el-mejor-pan, you can make delicious bread that’s soft on the inside and crispy on the outside. From choosing the best ingredients to mastering kneading and proofing, each step helps create a perfect loaf. Just remember to be patient and enjoy the process—it’s all part of the fun!
With a little practice, you’ll soon be baking bread that tastes just as good as what you’d buy from a bakery. Whether you’re making classic white bread or experimenting with new flavors, these simple tips will help you achieve great results. So, grab your apron, gather your ingredients, and start baking your way to delicious homemade bread.
Get the Latest Updates On knowlegdera
FAQs
Q: How important is the quality of ingredients in bread making?
A: Quality ingredients are key for great bread. Using fresh, high-quality flour, yeast, and water can greatly improve the texture and taste of your loaf.
Q: What is the best flour for making bread?
A: Bread flour is best because it has more protein, which helps create a chewy texture. All-purpose flour works too, but bread flour gives better results.
Q: How long should I knead bread dough?
A: Knead the dough for about 8-10 minutes by hand or until it’s smooth and elastic. You can also use a stand mixer with a dough hook for easier kneading.
Q: How do I know when the bread dough is ready to bake?
A: The dough is ready when it has doubled in size during proofing and springs back when you gently press it. This usually takes 1-2 hours.
Q: Why is steam used during baking?
A: Steam helps create a crispy crust by keeping the dough moist in the early baking stages. You can create steam by placing a pan of water in the oven.
Q: How can I store homemade bread to keep it fresh?
A: Store your bread in a paper bag or bread box for 2-3 days. For longer storage, freeze it in plastic wrap and reheat it when needed.
Q: How can I make my bread soft inside and crispy outside?
A: Using steam during baking and baking at the right temperature helps achieve a crispy crust, while proper kneading and proofing make the inside soft and airy.